Install, recover, or remove Tilo
Start by choosing how much of the computer Tilo should manage.
- A desktop session adds Tilo to an existing Linux installation. Your Linux distribution still manages boot, encryption, updates, accounts, and recovery.
- The complete system installs the image-based Tilo operating system. Tilo then manages the disk, encryption, system updates, and recovery.
- A virtual machine is the safest way to look around. Its virtual disk is separate from the host computer.
Check availability first
The public alpha is not published yet. The download page is the source of truth: when a supported release is ready, it will list the image, Tilo Imager, checksums, signatures, and tested platforms. Until then, do not use guessed release URLs or unsigned CI artifacts on a machine that matters.
You can read the steps below now, but begin an installation only after the download page offers the files for your computer.
Try Tilo without changing this computer
Use a virtual machine with a new, blank virtual disk. The VM guide covers the recommended firmware, memory, graphics, and disk settings. Shut down the VM and delete its virtual disk when you are finished.
You can also boot the live USB and check the display, keyboard, pointer, and network without choosing an installation destination. Restart and remove the USB to return to the installed system.
Add the desktop to Linux
Choose the guide for Fedora, Ubuntu or Debian, Arch, or NixOS. The x86-64 packages are published, install-tested, and available from the signed public repositories. ARM64 releases are not enabled yet.
After installing the package:
- Save your work and sign out.
- Select your account on the sign-in screen.
- Open the session menu and choose Tilo.
- Sign in with your usual Linux password.
Choose your previous desktop from the same menu to switch back. Removing the Tilo package does not remove your personal files. Export or delete Tilo workspace data first if you no longer want to keep it.
Make a live USB for the complete system
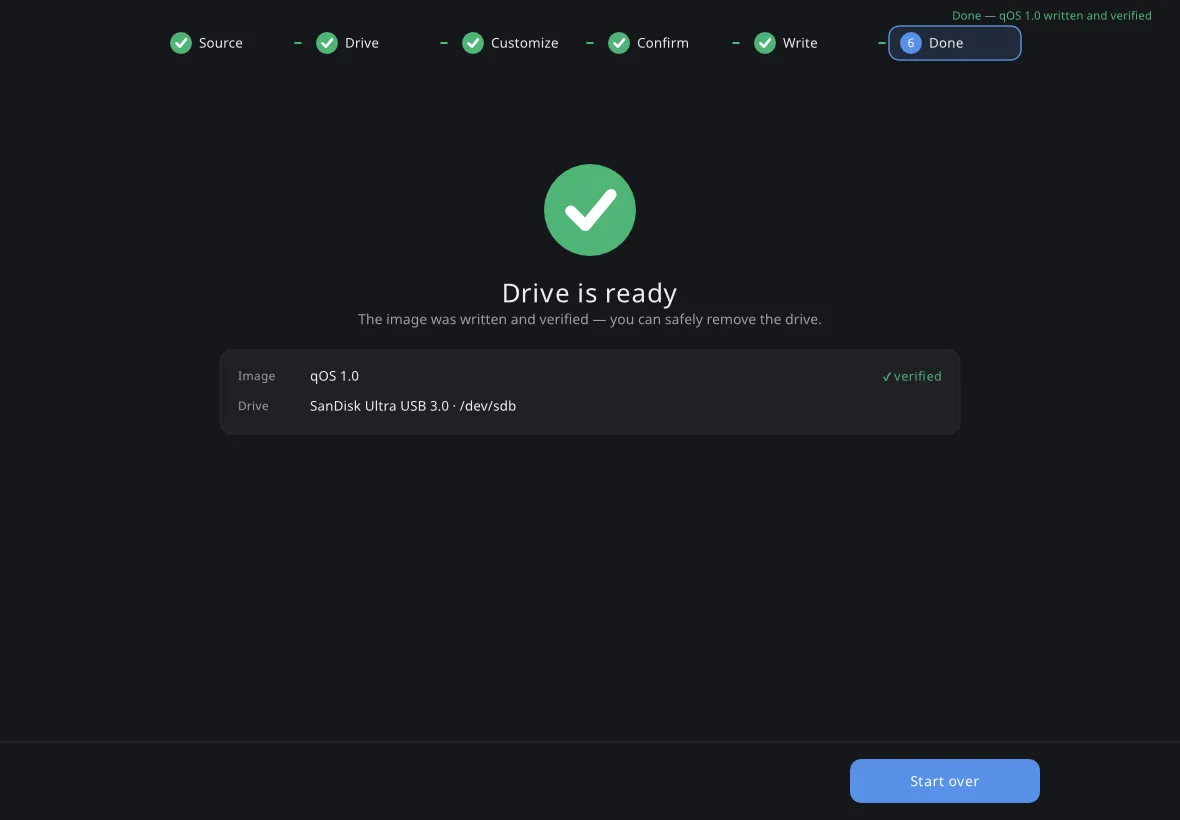
Once the download page publishes a release, open Tilo Imager and choose Install Media. It authenticates the image, writes it to the selected USB, and reads the result back to verify it.
Writing the image erases the USB. It does not inspect the current computer, copy personal files, resize an internal disk, or restart the machine.
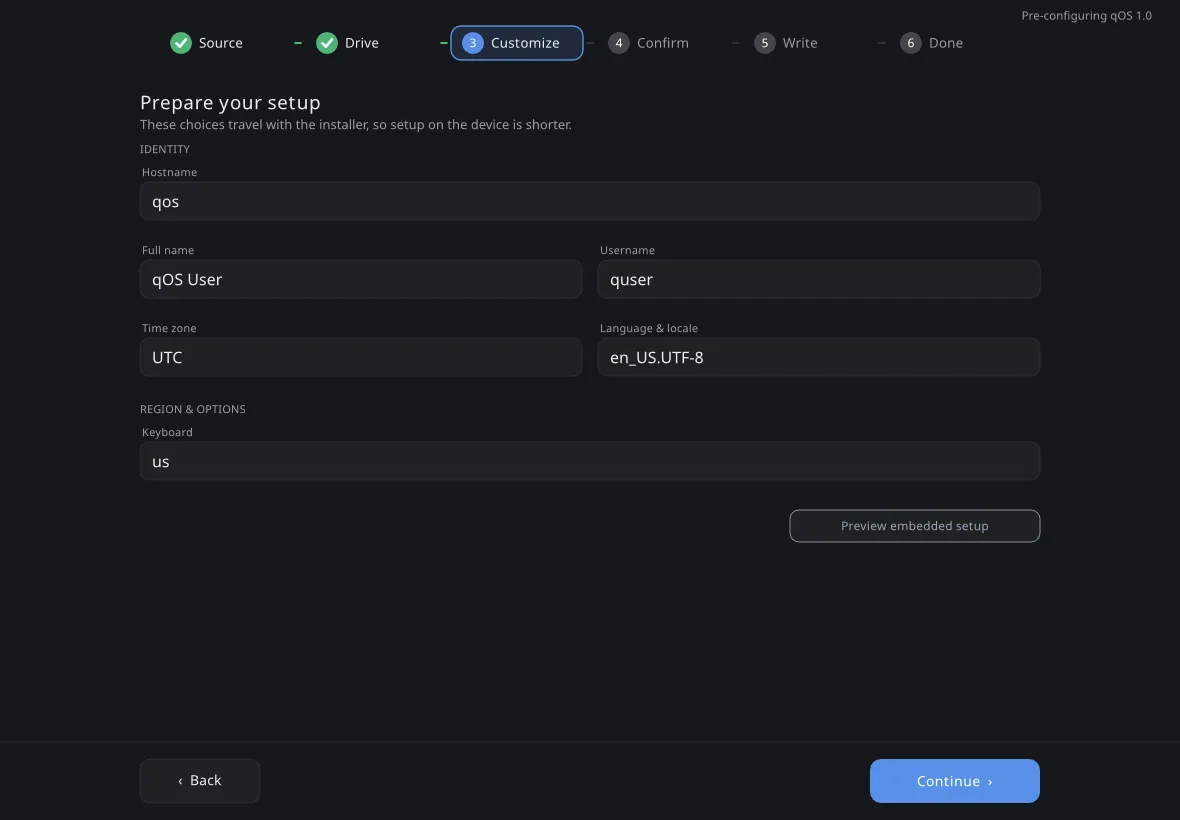
You may prepare the account name, device name, language, keyboard, time zone, and filesystem on the USB. Passwords, disk secrets, and recovery keys are never embedded in the installation media.
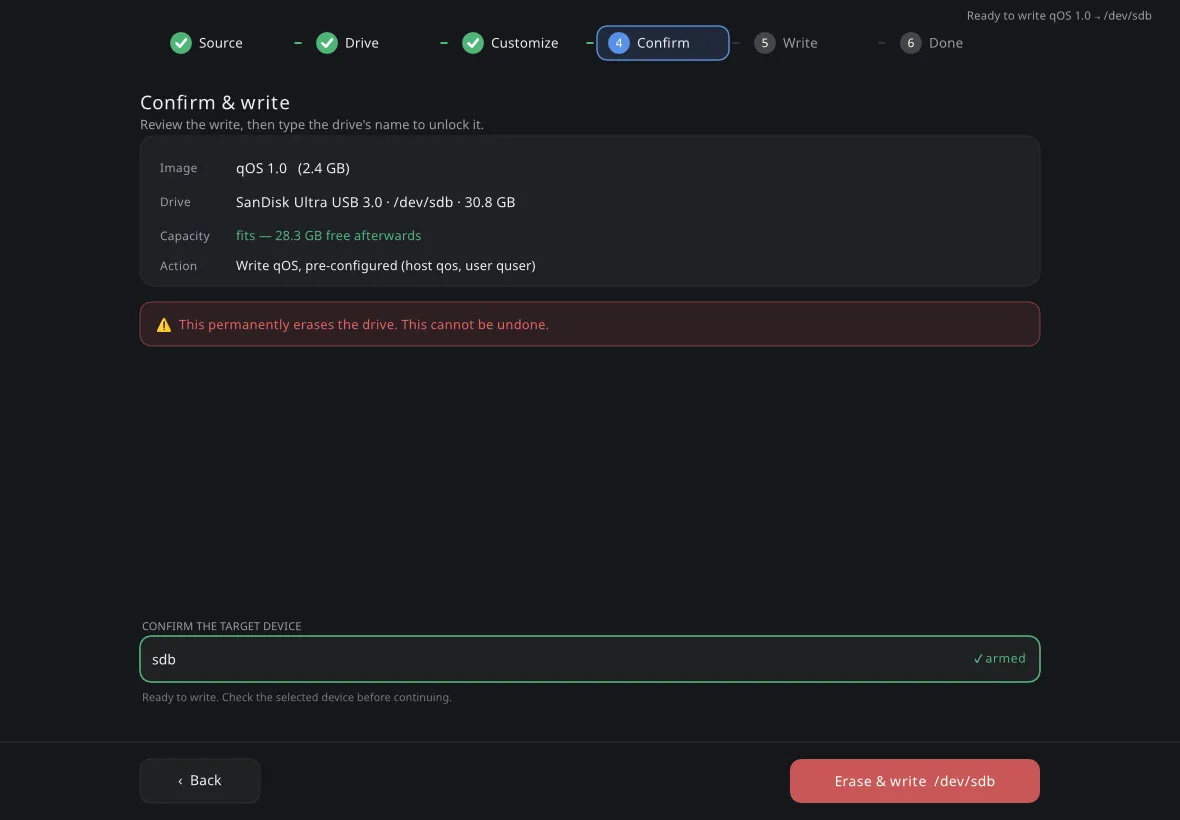
Read the model, capacity, and device name before confirming. If any detail is unexpected, go back and disconnect the drive you do not want to erase.
Install the complete system
Boot the verified USB from the computer’s one-time boot menu, test the essential hardware, and open Install Tilo.
Choose a disk layout
- Use this entire disk erases the selected disk and installs Tilo on it.
- Install alongside uses an empty, unmounted Linux root partition of at least 32 GiB. Prepare that space before booting the USB: the installer does not shrink Windows or Linux volumes. A healthy, unmounted FAT EFI partition of at least 2 GiB with 1 GiB free is also required on the same disk.
The review screen identifies each disk by model, capacity, connection, serial suffix, and device name. It marks untouched disks as No changes. Alongside installation formats only the selected root partition and uses, but does not format, the EFI partition.
Save the recovery key
Encryption is enabled for a complete-system installation. Supported machines can use a TPM with a day-to-day PIN; other machines use a passphrase at boot. The installer creates a recovery key in both cases.
Save or print that key somewhere other than the computer. You may need it after a firmware, motherboard, or TPM change. Installation does not continue until you confirm that you saved it.
Review and install
The final screen names every partition that will change. A whole-disk install also asks you to type the device name. Stop if the disk, partitions, or account are not exactly what you intended.
After installation finishes, remove the USB and restart. If installation fails, do not immediately try again: first read and save the failure report, because the destination disk may already have changed.
Finish first login
The local account unlocks this computer. Tilo then asks you to create a separate collaboration identity or connect an identity from another device. That identity attributes shared changes; it is not a vendor account and the desktop continues to work without a network connection.
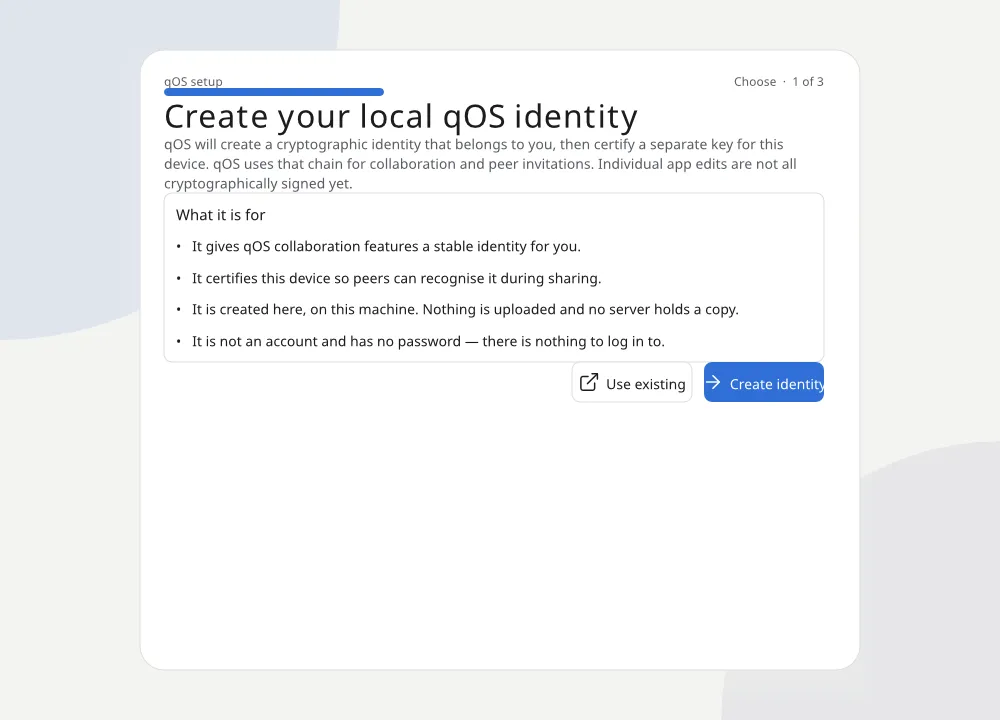
Save the encrypted identity recovery copy somewhere other than this computer, then take or skip the short desktop tour.
Update or roll back the system
This section applies only to the complete system. Tilo replaces the operating system as one verified image and keeps the previous image for rollback. A rollback changes the kernel, desktop, and software shipped in that image. It does not rewind your home directory or workspace data.
Open Settings → Updates to see the current and previous images. Choose Roll back, read the data warning, and restart. Tilo keeps the image you left, so you can move forward again if needed.
If a newly installed image fails to reach sign-in three times, the bootloader stops choosing it and starts the previous image. When no usable image remains, it offers Tilo Repair Mode instead.
Do not treat rollback as a backup; keep an independent copy of important work.
Use Repair Mode
Choose Tilo Repair Mode from the boot menu when the complete system boots but the desktop does not. After you unlock an encrypted disk, the console can start another deployment once, roll back, fetch the current image again, show the previous boot’s errors, or copy personal files to an external disk.
Repair Mode runs without the desktop, collaboration services, update timer, or remote login. If the system image itself cannot mount, use the installer USB to recover files instead.
Recover files from the live USB
Use this when the installed system no longer reaches the desktop:
- Connect a separate destination drive and boot the matching Tilo installer USB.
- Press
Ctrl+Alt+F2to open Tilo recovery tools. - List the disks, then choose Open Tilo files read-only. Select the Tilo root partition and enter its recovery key or disk passphrase if asked.
- Choose Copy files to an external disk. Select the destination partition; the recovery tool mounts it without formatting it.
- Enter one path below the recovered home, or
.for all home folders. The copy goes into a new, timestamped folder, and the tool safely unmounts the destination when it finishes. - Open files from the copy before repairing or removing the original.
Recovery always opens Tilo data read-only. It refuses a destination on the same
physical disk and checks that the destination has enough free space. Press
Ctrl + Alt + F1 to return to the graphical installer.
Make and check a backup
Backups is a separate Tilo app, not a Settings page.
- Open Backups from search and choose Choose folder to protect.
- Select the source in the system folder chooser, then choose Choose backup location and select a destination. Use another physical device when the work matters.
- Review the two folders, then create the snapshot. Backups writes it as one transaction and records a SHA-256 manifest for its files.
- For later snapshots, choose Back up now. Select any snapshot and choose Verify before disconnecting the destination.
To recover a snapshot, select it and choose Restore. Choose an empty folder when practical. Restore does not overwrite existing files by default; review any conflicts instead of replacing them blindly.
Backups currently creates local repository snapshots when you ask it to. It does not schedule automatic jobs or provide off-site storage. Keep the collaboration-identity recovery copy and disk recovery key separately: neither is an ordinary file backup.
Workspace history, system rollback, and backups solve different problems:
- History explains and reverses changes within a workspace.
- System rollback returns to an earlier operating-system image.
- Backups create and verify another recoverable copy of selected files.
Remove Tilo safely
For a desktop session, sign out, switch to another desktop, and use the removal command in your distribution’s installation guide. Your Linux installation continues to own the disk and boot process.
For an alongside installation, boot the Tilo installer USB and press Ctrl +
Alt + F2. Choose Remove an alongside Tilo installation, select the Tilo
root partition, and type the exact REMOVE fingerprint shown by the tool.
Removal works only when the partition has a matching Tilo ownership marker. It deletes that root partition and only the Tilo boot files recorded during its installation. It does not format the shared EFI partition, change another partition, or resize the remaining operating system. If Tilo cannot prove that it owns the selected partition, it refuses to continue.
The removed partition becomes unallocated space. Expand the remaining system with its own disk manager. If firmware still starts Tilo first, choose the other system once and make it the default in firmware settings.
This tool deliberately does not erase a Tilo-only disk. Use a trusted disk manager when repurposing that whole disk. Keep exports, verified backups, the identity recovery copy, and the disk recovery key before removing the last Tilo installation.